
How to Create Templates
Navigate to Campaigns > Templates Manager to create a new Email Template.
Email templates need to be created and set up in order to run Campaigns.
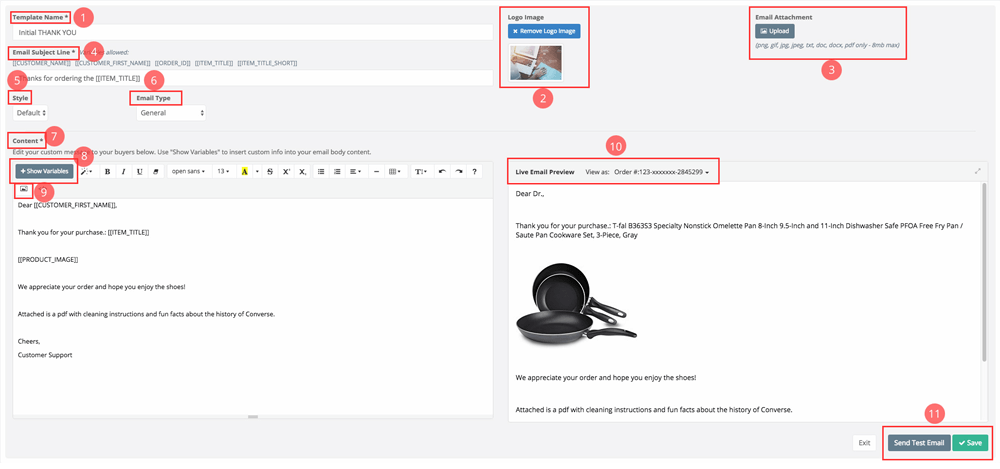
1. Template Name– Create a name for your template, this name will be used to distinguish different templates when creating a campaign.
2. Uploading Logos– You may upload your store logo in either png or jpeg file type. File size must be 1Mb or less.
3. Email attachment– You may attach .png, .gif, .jpg, .jpeg, .txt, .doc, .docx, or .pdf files to your email. File size must be 8MB or less.
4. Email Subject Line– This is the email subject line that your customers will see in their emails. You may add the variables here such as: Customer Name, Order ID, and/or Item Title.
5. Style– Choose between 4 different template color styles.
6. Email Type– You can categorize the purpose of each template. Choose from General, Feedback Request, Feedback Repair, Reviews, Reviews Repair, Shipping info, or Product Info.
7. Content– This is the main body of the email where you will enter content.
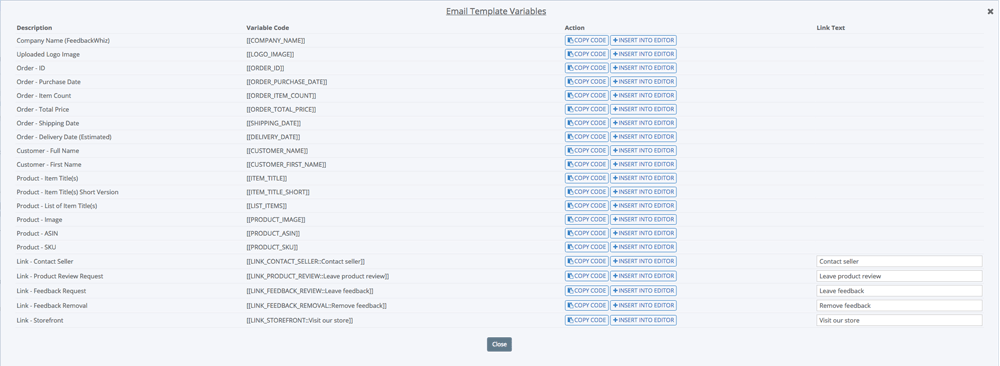
8. Adding Variables– Variables are specific details pertaining to each order. Choose from a list of variables you can insert into the content area. Variable Names are surrounded by “[[ ]]” so they don’t interfere with your other content in your email. To add a variable, click on the “Show Variables” button and a popup will appear. Click on “+insert variable” to insert where your mouse cursor is inside the content area. You can also click “Copy code” which will save the variable reference to your clipboard and you can paste manually into the content section.
Certain variables allow insert links into your email such as “contact seller” or “leave feedback.” You can customize what you want the link to display on the email by editing the “link text.” To find out more about what each variable means.
9. Picture – Insert an image either by uploading from your local computer (.png, .gif, .jpg, .jpeg) or paste an image URL. You can insert animated gifs as well.
10. Live Email Preview – This area will show you what your email will look like as you type in the content area. You may also select an order with the actual variables and content exactly how your customer would see it by clicking on the “View as order dropdown” and selecting an order number.
11. Send Test Email/Save – Send a test email to your own account or Save the template when you are finished editing.
More great videos: Seller Central Integration for Opt-Outs and Refunds
0 Comments